The Build workspace is where you put the rocket together. Add and arrange parts in the tree, edit their dimensions in the details panel, and check the result in 3D as you go. Mass, CG and stability update whenever you commit a change.
Start with a source#
Open a new rocket and pick how you want to begin:
- Start from scratch
A clean design with a single empty stage. Add a nose cone and a body tube and you have a rocket; everything else is optional.
- Load an example
Complete example designs you can inspect, modify or use as a starting point.
- Import a design
Bring an existing OpenRocket (.ork) or RockSim (.rkt) project in through the import wizard. Supported parts, materials, placements and motors are converted, while anything that needs attention is reported for review. See Import.
The editor keeps a draft in your browser as you build, so if you come back to a new rocket with unsaved edits, it resumes where you left off.
Understand the workspace#
The builder is a three-panel layout.
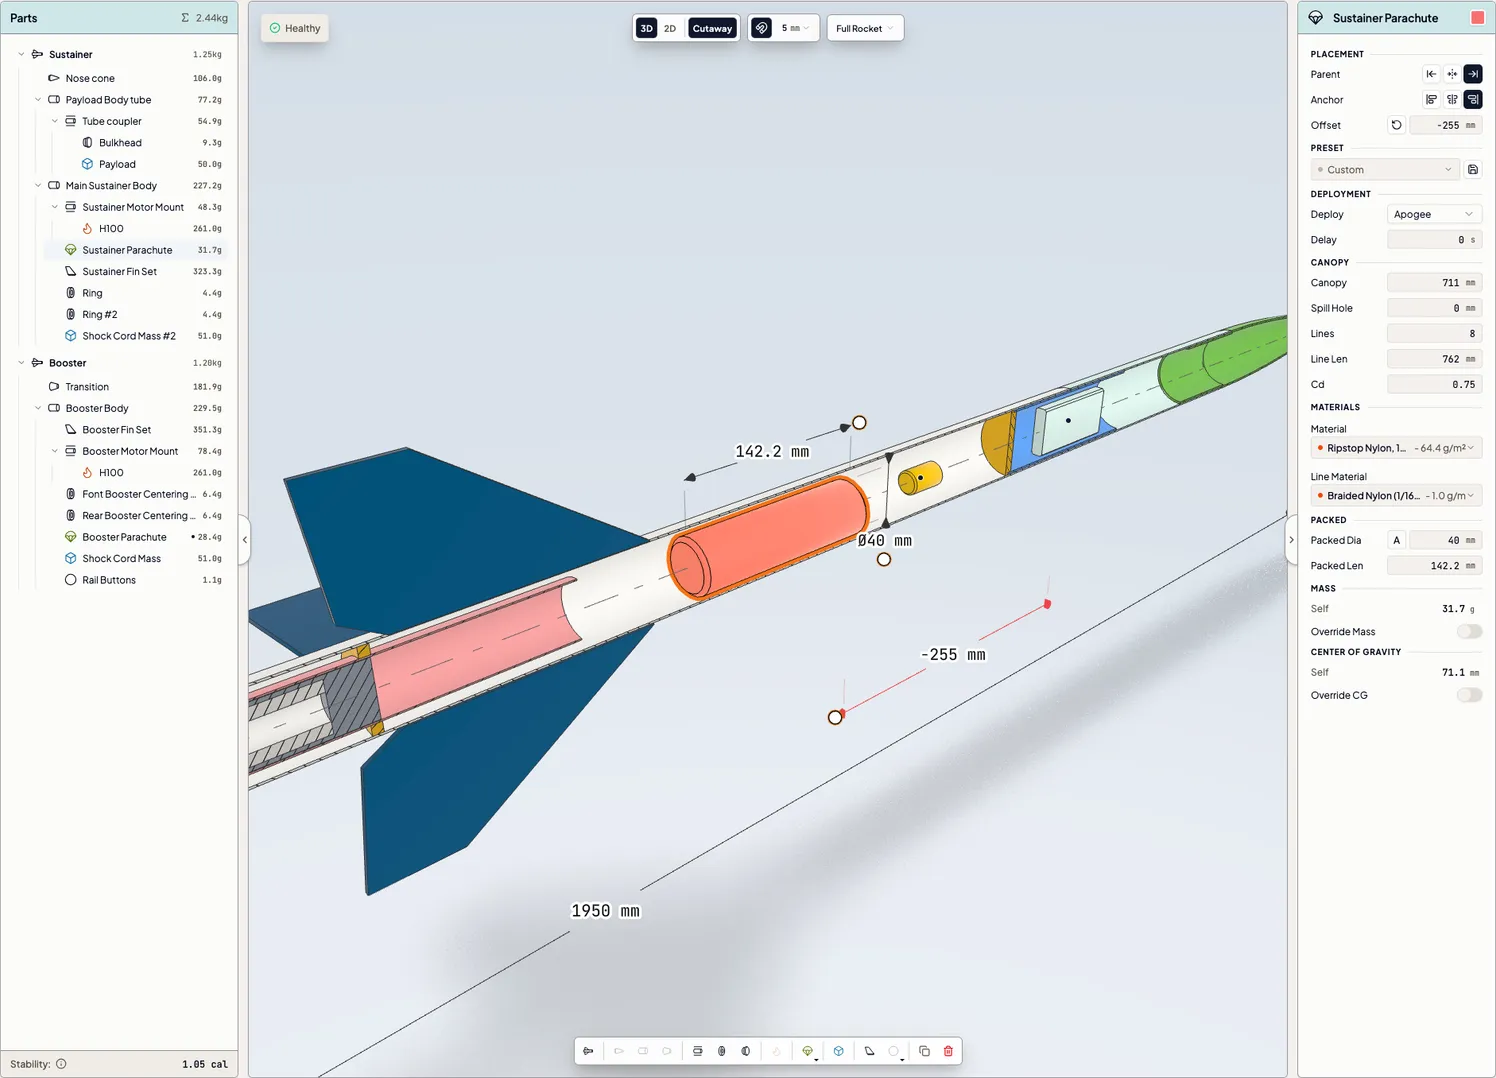
- The parts panel on the left shows the stages and the parts inside them. Its header shows the rocket's total mass. Use Σ to switch each row between the part's own mass and the mass of everything nested inside it. The stability readout stays at the bottom. Working with Parts covers it row by row.
- The 3D canvas in the center shows the rocket and the dimensions of the selected part. Use the controls at the top to switch between the 3D and 2D views, turn on the Cutaway and adjust snapping. The validation status sits in the corner. The toolbar along the bottom groups new parts by family and also provides controls for duplicating, deleting and adding stages.
- The details panel (right) shows the editor for whichever part is selected. Numeric fields validate and commit on blur or Enter; there is no panel-level save button, and every committed edit is undoable.
Collapse either side panel when you need more room for the rocket. The header contains the rocket's name, save status, sharing, cloning, undo and redo controls, and the Build and Simulate tabs. On a phone or tablet, part details open in a bottom drawer.
Navigate the 3D view#
The canvas has two projections:
- 3D is the perspective, free-orbit view: left-drag orbits, right- or middle-drag pans, and scroll zooms toward the cursor.
- 2D is the orthographic flat schematic, for reading the design like a drawing. Orbiting is locked, so dragging pans and scroll zooms.
Cutaway cuts the model open through the centerline and hatches the cut faces, so you can inspect internal fit without disassembling anything. All three toggles sit in the control island at the top of the canvas. On touch devices, one finger orbits (3D) or pans (2D), and a two-finger pinch zooms.
There is no manual reset button — the camera frames the rocket when a design opens and re-frames proportionally as the geometry changes.
Keyboard shortcuts#
- W A S D or the arrow keys pan the camera (click the canvas first so it has focus).
- ⌘/Ctrl + Z undoes; add Shift to redo.
- Esc cancels placing a new part.
- ⌘/Ctrl + click adds to or removes from a multi-selection, on the canvas or in the tree.
- Holding Shift while dragging any handle switches to fine control — quarter-speed movement for dialing in a value.
The fin-outline editor adds two more click modifiers of its own — see Editing fin outlines.
Build, save, and share#
Drafts live in your browser; hitting Save puts the rocket in your account with a name and description you can edit any time. From the editor header you can also:
- Toggle visibility between private and public. A public rocket gets a share link anyone can open read-only.
- Clone a rocket — yours or a shared one — into an independent copy you can take in a new direction.
- Export the printable parts as 3MF for 3D printing — Export & 3D Printing covers the options.
Move toward simulation#
When you're ready for a full simulation, switch from Build to Simulate. Validation runs while you edit and flags issues such as a missing motor, no recovery device or marginal stability. Errors must be fixed before the simulation can run. Preparing to Simulate covers what gets checked and how to read the numbers.